Showing posts with label Bluetooth. Show all posts

Saturday, July 30, 2022

Playing Midis from my iPhone on my Mark IV Disklavier via Bluetooth


Make sure your piano is ON and not in standby.  


I run Disklavier Controller app from my iPhone to activate my piano: I select a song and play, then stop.  


        Note: Use the app that is associated with your piano to play a song to make sure the piano is active or just go to your piano and turn on and play a song.


I connect my Bluetooth device which is hooked to my piano by selecting
midimittr app.  

    Note: you may have a different app that allows you to connect your bluetooth device located on your piano in the midi port.


If using midimittr, select Devices icon from lower bar on screen.  The following screen should appear.  Click on "Not Connected" next to your device (i.e. mine is m1.1).  Eventually "Connected" should appear next to your device.


I use an app called MidiOnStage for iPhone to store midis and to play via my bluetooth device to my Mark IV Disklavier piano.


If you use MidiOnStage app, you need to click on Settings>General and scroll to bottom of screen to Midi Output and select your device.


MidiOnStage allows multiple ways to load midis from Mac laptop  to the app.  Note: The midis added to MidiOnStage songs list are stored in the Files app on your iPhone.  

You can use Airdrop to move a midi or an entire folder of midis directly from your laptop to your iPhone and into MidiOnStage.  

Click on a midi filename on your laptop, hold down the option key while clicking on filename, then select Share option and select Airdrop to your iPhone.  Then select MidiOnStage from Airdrop menu that appears on your iPhone. 


Note:  If you are moving an entire folder of midis,  you will need to select a path to Files >On My iPhone>MidiOnStage folder from the Airdrop options menu.

Using MidiOnStage, you can create Playlists by using the + icon at top of the Playlists screen. You will be asked to enter a Playlist name to create.  You can then use the various screens and + buttons to maneuver and add songs to your playlist.  


You can select a song to play or an entire playlist.  click on play button to start playing.  Your midi songs should play on the piano.  


Wednesday, August 28, 2019

Playing Midis via Bluetooth from my Mac to my Disklavier Mark IV

 I connected the mi1v2 Bluetooth midi device to my Disklavier Mark IV this evening.


I purchased the Bluetooth midi device from Amazon at
https://www.amazon.com/Wireless-MIDI-Interface-mi-1-Rev-3/dp/B01D61QK6W/ref=asc_df_B01D61QK6W/?tag=hyprod-20&linkCode=df0&hvadid=312118595187&hvpos=1o1&hvnetw=g&hvrand=14263083875715554474&hvpone=&hvptwo=&hvqmt=&hvdev=c&hvdvcmdl=&hvlocint=&hvlocphy=9029598&hvtargid=pla-570048501731&psc=1

 Description of device:
Wireless technology    Bluetooth Low Energy
Bluetooth LE MIDI Profile    Apple Bluetooth LE MIDI (iOS 9)
Connectors    1 x MIDI IN (5pin-DIN)
1 x MIDI OUT (5pin-DIN)
Switch、Indicator    1 x Hall element Switch
1 x Magnet
1 x white LED
Power Supply    From MIDI Out 3.3V-5.0V
Compatible iOS devices    iPad (3rd, 4th), iPad Air2, iPad mini, iPad mini 2, iPad mini 3,
iPhone(4s,5,5s, 6, 6plus, 6s, 6splus) iPod touch (5th, 6th)
Compatible OS    iOS8, iOS9, OSX (Yosemite, El Captain)
Firmware Update    On the air by using Piano Jukebox
iOS Apps for mi.1    mi.1 connect : bridges mi.1 and Core MIDI music apps
Piano JukeBox : Simple SMF player, firmware updater
Power consumption    7 mW (when MIDI OUT is 3.3 V)
25 mW (when MIDI OUT is 5 V)
Steps:
  • Turn Piano off.
  • Connected mi1vi2 Bluetooth devices input/output pins to I/O center at front of piano when piano off.  There are arrows on the device to aid in connecting properly.
  • Then turned piano on and made sure piano still worked.
  • Used instructions from http://quicco.co.jp/products/
  • Updated the device using Piano Jukebox app on iPhone  (be sure to get this app for your iPhone to use for update…
Firmware update
Updating the firmware is recommended to ensure that the mi.1 can be used in the most optimal condition. To do this, please download the dedicated iPhone/iPad application "Piano Jukebox" (free) from the App Store.
1. Launch the Piano Jukebox app
2. Tap the wheel icon and select 'Firmware Update'
3. Turn on the MIDI instrument to which the mi.1 is plugged, then tap the 'OK' button
4. Tap the 'Upload' button when it becomes available (blue) †
5. Keep the MIDI instrument turned on while updating the firmware
6. When the firmware has uploaded successfully, a message will be shown .
How to connect to iPhone/iPad
The connection between mi.1 and the iOS is made by Bluetooth Low Energy MIDI. The connection is managed in the “Bluetooth Midi Devices” List which the Piano Jukebox or some other MIDI apps have.
Preparation: Turn on the device to which the mi.1 is connected
1. Launch the Piano Jukebox app
2. Tap the mi.1 icon in the menu bar
3. Tap the “Not Connected” next to the mi.1 in the list.
4. You can now use the Piano Jukebox and other MIDI apps, such as GarageBand, on your iPhone

How to connect to Mac
1.For the connection between Mac, go to Application/Utilities folder and open Audio MIDI Setup.
2. Launch the "Audio MIDI Setup" tool
3. From the titlebar menu, select Window > Show MIDI Studio
4. Double-Click the Bluetooth Icon
5. Click the "Connect" button
6. If the button changes to "Disconnect", the mi.1 has connected successfully
7. MIDI apps can now recognise the mi.1 Bluetooth as a MIDI device.

Next I needed to decide on the best option for playing midis on my Macbook Pro.  I decided to purchase MidiYodi which works with this Bluetooth device, set up using Audio Midi Setup on Mac laptop.  This is a pretty good midi player for my current Macbook Pro running High Sierra  10.13.6.  I decided on this midi player because of the reasonable cost, the extensive online manual and the ability to create and save playlists.  It also has some editing capabilities.  MidiYodi can be found at:  https://www.canato.se/midiyodi/


Other Midi software that I tried out that worked with this Bluetooth device connected to my Disklavier Mark IV included:
Midikit is trial only, would need to purchase the version for 11.99 - good for editing titles and channels. No playlist capability.  Make sure connected to device by: looking under Midikit menubar select Midi Settings. Click on Midi port.  And the mi 1 bluetooth device should show up
Midiswing worked and needed to make sure to select output: Bluetooth (Quicco Sound Corp.) 2
Sweet Midi which has playlist capability. $29.95 USD

Most of these played midis using the Bluetooth device  but lacked playlist capabilities. In order to get some of these to work, I had to go to preferences or audio setup or midi settings in the individual apps and make sure that Bluetooth was selected.


** Update:  After hooking up Bluetooth, I noticed the only channel that was playing was Channel 1.  Needed to access Setup>Midi on my Mark IV PRC remote to set the channels for piano playback.  
 

Friday, July 05, 2019

Connecting Older Car Speakers with iPhone and Bluetooth FM Transmitter for Older Cars

I am back from traveling the world. My blog for tips and helps is now resuming ...

I have plans for some road trips in the USA.   My preferred road trip car is an older convertible, but unfortunately it doesn't have all the bells and whistles of most newer cars.  It does, however, have a nice set of speakers which I plan to utilize. I want to avoid replacing the original radio system.  I am investigating some of the tech devices available for older cars. One device, the Nulaxy KM29 Bluetooth FM Transmitter, looks like a promising solution.


My iPhone is equipped with Bluetooth and has adequate voice navigation apps and streaming music capabilities for an enjoyable journey.  So, I want to use the Bluetooth feature on my iPhone with a device that will connect to my speakers/radio.  The KM29 Nulaxy Bluetooth FM Transmitter has Bluetooth that can easily connect to my iPhone, as well as several other modes of input that allow for listening to music.

The Nulaxy device has:
  • A TF card slot ( a TF card is smaller version of a SD microchip card) (It uses an adapter, so it can be inserted into a SD card reader to load on music from a laptop or computer.  I had to purchase one of these cards separately, as it was not included in package.
  • An auxiliary input.  The package does include an auxiliary cable to hook up transmitter to a device like an iPod or even your iPhone.
  • A USB memory stick connector.  (USB stick is not included in package)
All of these inputs can be used to play music files or audio books stored on either the card, stick or a device like an iPod connected to the audio in jack.

The FM transmitter is easily plugged into a cigarette lighter in your car and has a swivel type arm and nice 1.8" screen for viewing information like song titles, battery info, switching songs, scanning for FM station, volume control etc. It comes with 2 USB ports which can be conveniently used to keep your iPhone, iPad and/or other devices charged. The device has various buttons for searching thru folders, scanning channels, skipping back and forth thru songs, selecting folders, songs, and equalizer modes.

There is a brief instruction sheet that comes with the product.  It takes some definite practice to figure out the buttons and modes.  A short press on the middle button in center allows for selecting the input modes: USB Stick, Bluetooth, or TF Card.  How long you press the button determines various options.  For instance, you can accept an incoming phone call by pressing the center button onceHolding it for 3 seconds, rejects the call.  Pressing the same button twice, redials the last phone number. 
 

When plugged in, the transmitter can be used to connect to any unused FM radio station. First  select the unused FM station on the radio and then using the 'scan or CH button' capability on the KM29 select that same unused station on the device.  The transmitter will also connect to your Bluetooth device.  You will need to open Bluetooth settings on your iPhone and select the Nulaxy Transmitter initially, but after that it auto connects when you get in the car the next time.  When you play songs on your Bluetooth connected iPhone from your Music app or Pandora, you will hear the music through your car speakers. 

I have also tested playing from the TF card slot and USB memory stick port - both worked fine.  I did have to figure out the best way to put songs on the card and stick in a format that was easily read and navigated by the buttons on the KM29.  Both card and stick supported folders.  Key to file structure was to make sure that I used only mp3 music files.  I made folders of artists and nested albums for the artists and songs inside the artist folders.  I didn't test, but I would suspect you could have a genre folder too.  "Wav" format is also acceptable according to the instruction manual, but I didn't test.

Notes:  Basically to setup the USB stick and/or TF/microSD card, I used only mp3 files.  I used a USB hub to connect to my Mac laptop and to transfer files from my user directory's media files (Music folder) to each device using drag/drop.  I also ran a software application on my laptop called HiM  (Hidden Cleaner Improved by Fernando Iazeollo) to strip hidden files from the stick and the TF card.   I used artist> album> song file structure.  I also deleted and emptied trash or all mp4 songs and albums with  only one song inside.  The TF card is limited to 32GB.  Scrolling through the screens took time.  I could use the button in center by turning it to go thru a list on the screen or I could use the forward/back buttons to move through the list. 

The auxiliary in line allowed me to use an old iPod full of music to play thru my speakers and worked great. The auxiliary in line plays continually even while you might be playing another mode such as TF card or USB Stick. When I was playing music using the auxiliary input mode, the music continued to play when a phone call came in, but sound was lowered somewhat. This would not be optimal if you were listening to an audio book.  You would probably prefer a pause if a call came in at the same time. 

If you have connected your  iPhone via Bluetooth to the transmitter,  you merely need to press the center button to answer any incoming phone call.  This is a great hands off method of talking on your phone through the speakers in your car.  The music from your iPhone which might be playing is paused and resumes later after you hangup the call via the same button.

So for about $20, I can use my iPhone over existing car speakers with current radio system, stream my music playlists and songs or play Pandora, or use MP3 Books app to listen to an audio book.  I can also run Apple Maps or Google Maps to get voice navigation which also comes over the speakers.

This device is a great, inexpensive way to provide you with voice navigation, streaming music from your favorite road trip playlist, while having the ability to talk on your phone hands-free.  Just what I was looking for!

If you have any problems or questions about this particular device, don't hesitate to comment below.  I will try to answer any questions or concerns you might have.

Stay tuned for another blog in future -  How to use the "Shortcuts" app on iPhone to setup your road trip apps from one home screen button. When I get in my convertible and cruise down the road, I will be able to hit one button on my iPhone that will load in my music list - start playing the first song,  load in my mileage record app, text someone that I'm on my way, load in the directions and map to my destination, activate voice navigation and check the weather of my destination. 

Note:  For more info on HiM (Hidden Cleaner iMproved) -- a simple drag-and-drop utility that cleans and ejects USB devices like MP3 players, USB sticks... (and also local folders).

 go to https://www.macupdate.com/app/mac/52076/him 


Saturday, August 25, 2012

Solution for Transfering Photos from iPad to Computer and Back

When transferring photos between your mobile devices like iPad and iPhone or to your MacBook Air and back, you need to consider the amount of time and bandwidth or data transferred via the cloud.    As an alternate solution, one should consider one of the excellent apps available to do this efficiently and seamlessly.

How It Can Be Accomplished with PhotoSync

PhotoSynch is such an app available for the Mac and also the iPhone/iPad devices.  PhotoSync allows synching photos in both directions without hassle, using an easy-to-use interface, which allows transfer of all photos or a selection of photos. 

* This transfer from device to computer and computer to device can be accomplished via a wireless connection or 3G/LTE. The device to device transfer is available using bluetooth and wifi.
* The number of photos you plan to transfer can be limitless, but I haven't tried that yet.
* You can share photos to other sites such as Facebook, Dropbox, Picasa, and others like Google Drive (the new Google Docs).


* It also has Web Browser viewing capabilities where you can view your photos in a web page from a computer on your same network.
* Transfer is done in the background, allowing iPhone and iPad users to continue with phone calls or games.
* You can select the size to send, which computer to use as your default storage.


* You can setup defaults in the settings of the app for quick transfers and also choose to send to a certain folder or to iPhoto on your computer directly when receiving or sending photos.


Support for Mac and Windows Companion App

The iPad/iPhone app is relatively inexpensive for your iPad/iPhone and comes free for use on your desktop or Mac laptop (Mac OS X10.5 or higher Intel and PPC supported).  There is also a Windows PhotoSynch companion app that works for those using a PC as their default computer (Windows XP SP 2 or higher, Windows Vista or higher, Windows 7).  Location services needs to be enabled in order to use the app successfully.

For those who don't want to use a cloud server or have limited wifi capability or your internet connection is down this is a great solution as it offers a means to transfer photos and videos between devices and computers using a local network. I give PhotoSync a thumbsup rating of 5 stars for all my fellow travelers and photographers.


Tuesday, May 03, 2011

Bluetooth Keyboard Shortcuts That Work with iPad/iPhone Devices

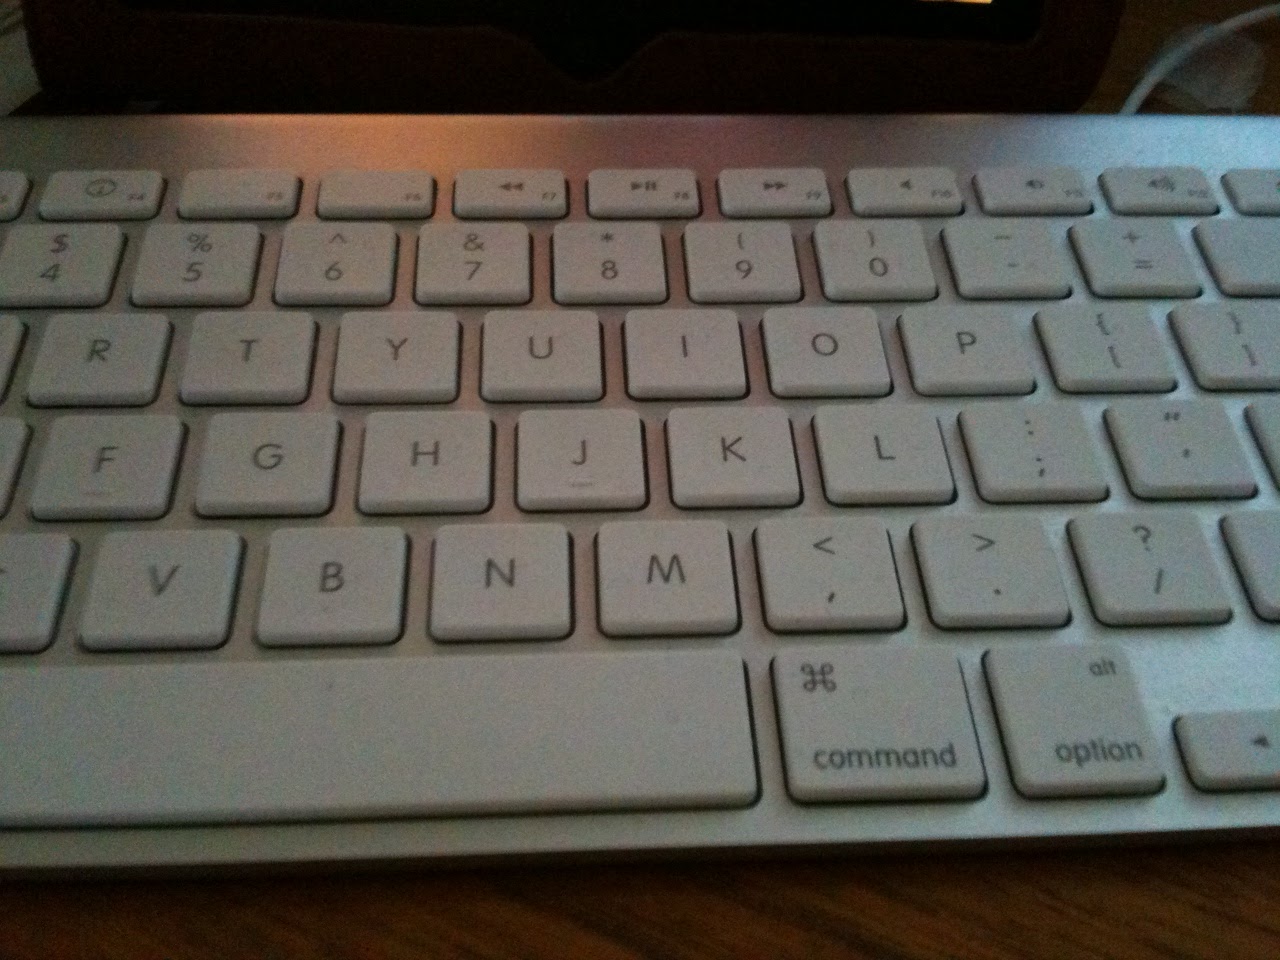
If you use an iPad for any type of writing or journaling, you probably use Apple's wireless bluetooth keyboard.  I decided to post a list of some of the keyboard shortcuts that work with the keyboard bluetoothed with an iPad or iPad 2 or even your iPhone.

To pair your keyboard with your device, select General>Bluetooth in the Settings options.  Turn bluetooth ON and also turn on your bluetooth keyboard by pushing in the button on the keyboard that is located on the upper right-hand side of the physical keyboard.  Your mobile device will try to discover the bluetooth keyboard and once that it finds the keyboard, a dialog box requesting you to enter a PIN number on your keyboard will appear on the screen.  Once the PIN has been entered, be sure to hit the return or enter key.  You should then be connected and can start typing away.

Keyboard Shortcuts for Controlling Device Settings:
F1 - decreases the brightness on the device screen
F2 - increases the brightness on the device screen
Space Bar -  when your screen has gone to sleep will wake it up.

If you want to play some iPod app music in the background while you type
F8 - play or pause media
F9 - navigate forwards for media playing, next song
F7 - navigate backwards for media playing, previous song
F10 - mutes the media
F11 - decrease the volume for the media playing
F12 - increase the volume for the media playing
Option (or Cmd or Shift or Cntrl) + F9 - skips to the next album
Option (or Cmd or Shift or Cntrl)+ F7 - returns to the previous album

Keyboard Shortcuts for Selecting Text or Moving within text paragraph or document:
Cmd A - Select All
Cmd C - Copy Text
Cmd X - Cut
Cmd V - Paste
Option + Delete - delete entire words one at a time to the left of the cursor
Cmd Z - Undo
Shift + Cmd + Z - redo

Shift + Right Arrow - selects/deselects letter by letter moving to the right
Shift + Left Arrow - selects/deselects letter by letter moving to the left
Shift + Up Arrow - selects/deselects text when moving up
Shift + Down Arrow - selects/deselects text when moving down

Option + Shift + Right Arrow - allows you to select/deselect text word by word when moving right
Option + Shift + Left Arrow - allows you to select/deselect text word by word when moving left
Option + Shift + Up Arrow - allows you to select/deselect text line by line when moving up
Option + Shift + Down Arrow - allows you to select/deselect text line by line when moving down

Cmd + Up Arrow -  move the cursor to the beginning of document
Cmd + Down Arrow - move the cursor to the end of document (also works with Cntrl)
Cmd + Right Arrow - move the cursor to the end of the line  (also works with Cntrl)
Cmd + Left Arrow - move to the beginning of the line

Tab  - indents the text
Right, Left, Up and Down Arrows - will move the cursor in the body of the text
Eject Button (top row right-hand side of keyboard) - disconnects bluetooth keyboard to allow accessing the virtual keyboard on the device
Cmd + Spacebar - select a different (International) keyboard if one has been added to the list of available keyboards in the General Settings for the device.

Keyboard Shortcuts to Yield Special Symbols - Using option key and letters/numbers yields special symbols, and using option shift and a letter/numbers produces some additional symbols.  Option w - yields the symbol ∑
Option r - yields the registered trademark symbol ®
Option d - yields the symbol sigma ∂
Option p -  yields the symbol for pi  Ï€
Option g - yields the symbol for copyright ©
Option 2 - yields the symbol for trademark ™
Option x - yields the symbol for approximately equal to ≈
Option v - yields the square root symbol √
Option k - yields the degree symbol ˚
Option 4 - yields the cent symbol ¢
Option j - yields the delta symbol ∆
Option , - yields the lesson than and equal to symbol ≤
Option . - yields the greater than and equal to symbol ≥
Option / - yields the division symbol ÷
Option n + (then release option key) followed by letter n - yields the ñ
Option e = (then release option key) followed by letter e - yields é
Option ` = (then release option key) followed by a or e or i- yields à and è and ì
Option 5 - yields the infinity sign ∞
Option 8 - yields the bolded bullet •
Option ; - yields the ellipse symbol (3 dots in a row) …
Option b - yields the integral symbol ∫
Option 1 - yields the upside down exclamation point ¡

There are also a number of symbols that can be typed when using the shift key along with the option key and a letter/number
Option + Shift + k - yields the apple symbol 
Option + Shift + 3 - yields the less than symbol ‹
Option + Shift + 4 - yields the greater than symbol ›
Option + Shift + letter o - yields the null symbol Ø
Option + Shift + 2 - yields the Euro symbol €
Option + Shift + equals symbol = - yields the ± symbol
Option + Shift + left bracket [ - yields the right double quotes ”
Option + left bracket [- yields the left double quotes “
Option + Shift + right bracket ]- yields the right single quote ’
Option + right bracket ] - yields the left single quote ‘
Option + Shift + front slash / symbol - yields the upside down question mark used in Spanish ¿

Presently, not all keyboard shortcuts work with the iPad and iPhone, such as some important ones for bold, italics and other text formatting within apps.  Not all apps will allow using the keyboard shortcuts.  The trick of hitting the space bar twice to add a period and start a new sentence  does not work. 


Saturday, April 30, 2011

A StarTrek Transporting of Photos/Videos using PhotoSync App

Some iPad 2 users are looking for ways to transfer their videos captured with their iPhones to iMovie app loaded on their new iPad 2.  One solution is to sync the video to iTunes from their iPhone and then resync to their iPad 2.  Another solution requires the purchase of the camera connection cable.  With the cable one can connect the iPhone to the iPad and transfer the videos directly. 

I decided to try out using an app called PhotoSync as it is advertised to wirelessly transfer photos and videos between the two devices, as well as your computer.

The user can easily transfer from the devices to their computer over Wi-Fi.   You can download selected videos and photos to and from your Mac using the FREE companion PhotoSync app available for Mac OSX . (A Windows Companion is also available for Windows XP SP2 or higher).   I am always amazed at how these wireless transfers seem to be magic and feel as though I have witnessed a StarTrek transporting.   PhotoSync preserves the Exif data, GPS data and file data for photos and videos, as well as support for RAW images and photos/videos. 


Using PhotoSync with Bluetooth or WiFi if available, one can also transfer photos and videos directly from device to device.  I was able to transfer video and photos from iPad to iPad and iPhone to iPad and iPad to iPhone in a snap.  The transfer rate is 2.5MB/sec depending on your network and device.  Also supports DropBox and Flickr accounts and transfer to iPhoto and Aperture.

If you are looking for an easy and fast way to transfer instantly to your devices and computer without using iTunes or cables, I highly recommend getting the PhotoSync app from the iTunes App Store.  You only need purchase once and use for all your devices.  Click here to access PhotoSync website

Friday, March 25, 2011

Using iPhone with LandRover LR4


We just received delivery of our new LandRover LR4.  It is our second LandRover and has a few new bells and whistles that weren't available on the LR3 that we had for a few years.   I love the ease to which one can connect their iPhone(s) via bluetooth and the new touch audio system that allows for access of music from my iPod or iPhone.

The LandRover LR4 allows mulitiple iPhone connection via bluetooth.  I believe that they allow up to 6 or 8 iPhones to be connected via the bluetooth.  One merely turns on their bluetooth feature on their iPhone, select 'Phone' on the dashboard or from the Main Menu on the dash display.  It takes a few seconds and once you see LandRover in the list of devices that you can connect to on your iPhone, select that LandRover.  Once it is connected the name of your network (AT&T) and your iPhone name will appear on the dash display.  It automatically downloads your contacts from your Address book into the memory of the LandRover.  In fact, all the contacts from each of the iPhones that you choose to connect via bluetooth will have their own PhoneBook available on the dash display.

You can answer a call by touching the green phone icon on the dash display or on your steering wheel.  You can type in a phone number on the keypad on the display screen or access a phone number by scrolling the Phonebook on the dash display and then clicking on the green phone icon.  To hang up you merely touch the red phone icon on the dash or steering wheel. 

The LandRover will automatically display the last phone connected if it is still within range.  Once you get out of range, it will then recognize another phone that has been connected via bluetooth in the car and load in the Phonebook that corresponds to that phone.   This is a great improvement over the bluetooth system that was present with the LR3 model.  This allows both my husband and I to use our phones when the other one is not in range.  So when I am out and about my phone is connected and vice versa.  There is no need to turn off bluetooth and reconnect the iPhones each time we enter the car.  It remembers each iPhone.  

The LandRover LR4 also has an audio touch system and special connectors in the center console.  One of the connectors is made by LandRover and with the special LandRover cable we can directly connect an iPod or iPhone.  This connection shows up in the Auxillary Audio Section of the Main Menu as an option for audio.  The really neat thing is that it automatically loads your entire iPod music library of mp3's into the LandRover dash display.  You can browse your iPod/iPhone music library by playlist, artist, song and play in various modes with functions like: random, repeat, etc.  The name of the song that is playing is displayed on the audio screen.  Next the song is a right arrow key and you can touch this to display - artist, album title, genre, etc.   Below is a photo of the songlist display on the dash:


Another connector in the center console is for a direct connection for a memory stick.  We have one on order and I will let you know in a future blog or comment on this blog how that works out for storing music and using with the dash display.

I also tested the ability to use my iPhone while connected to the audio connector.  It worked great - I was able to play songs, make phone calls using the dash display Phonebook and buttons to call out and to also receive a call.  The song mutes while you are on the phone and then once you hang up or disconnect then the song is resumed.  If you want to run another app or browse the internet with your iPhone while music is being played through your car speakers, you can do that too!

Additionally -  The iPhone also charges while it is connected via the audio connector cable!

The car has some other cool features like auto dimming 'your bright' headlights when other cars approach on highway, a pretty good navigation system, HD radio, satellite radio capability, single CD player and front/rear and side cameras for aids in parking and backing up.

Overall, I am pleased with the improvements and the noticeably more stable ride.  Looking forward to a journey to test all the features.  My husband is anxious to take it into rock climbing mode.

Monday, August 16, 2010

All I want for Christmas is my two bluetooth devices - Magic TrackPad and Bluetooth iPhone Headset

I just received my Magic Trackpad this week and bravely ventured to connect it to my desktop Mac and give it a try. Of course, setting up a bluetooth device on a Mac is fairly straight forward. You turn on the device, turn on bluetooth in your system preferences and then click on a setting to have the Mac discover the device. It a matter of seconds, the device will show up as an option, ‘connect to device’. Shortly, you will be prompted to download the driver for the Magic Trackpad, quit all applications and install with a reboot.

Once connected you will want to open the ‘TrackPad’ hardware icon in your System Preferences and proceed to set up your TrackPad according to your preferences:

Basically, the entire process of settings is based on one, two, three and four finger movements.  One finger to click and to point or hover over icons, files and such on your desktop.  Two fingers to use to scroll left and right and up and down, to pinch open and closed and to zoom.   Three fingers is best used for me to drag icons, files, and things on my desktop.  Three fingers will select and will move things basically.  Four fingers can be set to use with Expose and to use across your desktop from left or right or up and down on the desktop.

For instance, if I swipe to the right or left on my TrackPad with four fingers, the cute dock of apps I am currently running magically appears in the middle of my desktop, allowing me to use the one finger click to select between these open applications.   If I swipe with four fingers in the up direction on my TrackPad my desktop is magically cleared of all open windows cluttering it.  If I swipe with four fingers in the downward direction on my TrackPad - all the apps reappear in a neat organized grid pattern on my desktop.

It takes a little practice to get used to using the trackpad, but the learning curve, even for someone in her 60’s was only about a half hour.   I only lost two files that I picked up with the three finger gesture and dropped somewhere.  Spotlight said they were on my desktop, but I wasn’t able to see them, so suspect that I dropped them outside the viewing desktop.  I just searched for the two files and used the spotlight search window to select them with one finger, move them with three fingers into a temp folder on my desktop.

I would have to say that my wireless mouse is now feeling a little neglected as this Magic TrackPad is replacing him.   I have also found that the battery in the trackpad has lasted much longer than the one in the mousepad.   It is said that blue-tooth devices are good for short distances and also use less energy.  We tested the use of the TrackPad from a larger distance from my real desktop and it did seem to lack the ability to communicate efficiently.

Now this may sound strange, but I have my desktop computer hooked via cable to my Home Theater setup in my office (which is also our theater room).   We like to watch Instant Movies from Netflix that run on the Mac computer.  We put the Mac computer into ‘Mirror Screens’ mode, and the movies play on the desktop computer, while simultaneously appearing on the Home Theater Screen.   We have to set everything up via the computer, but with the TrackPad and sitting in a chair facing the Home Theater Screen, rather than sitting at the Mac computer - we were hoping to operate the movie controls using the TrackPad as a remote so to speak.  We may have to test this out more and also determine the actual distance that the Trackpad still functions from the computer.

So wish me luck in getting this TrackPad to Magically control my Netflix movies with my Home Theater.

Saturday, July 17, 2010

Forget This Device BlueTooth Problem Solved

After updating to the IOS 4.0.1 System for my iPhone 3GS, I noticed that I could no longer pair my iPhone with my Apple Wireless Keyboard as before the update. My husband has the same configuration, except he is still using iOS 4 without the latest 4.0.1 beta update installed. He was able to connect to the keyboard with his iPhone without a problem.

I had been using my bluetooth settings to try to connect to Ping Pong Battle to demo to my son this past weekend, and was having problems. I also remember vaguely seeing the words 'Apple Wireless Keyboard' not connected when I tried to turn on bluetooth and thought that might be causing a problem with my connection to the ping pong app, so being the brave techie that I am, I selected FORGET THIS DEVICE.

As I researched online about how to now REMEMBER MY DEVICE, I saw advice about resetting all under settings>general> on iPhone. Tried that. Didn't help. Saw suggestion to take batteries out of bluetooth device such as headset or in car. That didnt work either.

Found Apple article about making your wireless keyboard discoverable. http://support.apple.com/kb/ht1936

By holding down the button on side of wireless keyboard and the eject key the green light started blinking. The keyboard was in discoverable mode and I was able to connect it to my iPhone.

Like magic what I thought was a bug in the new IOS 4.0.1 update was merely something I had done. Not at all Apple's fault, but mine.