What is Needed:
(1) An Apple Airport Extreme Base Station setup as WIFI Airport Network (WDS Main Base Station) for your home network.
(2) Macintosh computer running Mac OS X 10.4.10 or higher
(3) Airport Utility Software V5.2.1 or higher)
(4) Apple Airport Express device hooked to Mark IV Disklavier via ethernet cable connected from piano to Apple express device. Apple Airport Express is then plugged into wall socket near Disklavier or into the AC adaptor underneath the piano.
(5) Disklavier owners must upgrade their pianos to the most current operating system: Version 4.0 for Mark IV models which is available through a local Disklavier dealer or by calling Yamaha Piano Service at (800) 854-1569 (ext. 22).
STEP 1: If you ALREADY HAVE an Airport Extreme Base Station hooked to your computer for your home network, then GO TO STEP 2.
Otherwise, hook up Airport Extreme Base Station to your cable modem via ethernet cable and plug into wall socket. Run Airport Utility software. The Airport Extreme icon should appear on the left hand-side of the Airport Utility window. Select the icon representing the Airport Extreme Base Station. Select the "continue" button and go thru the assist options to set it up or you can use the "manual setup" button at left to set it up. Note: If device icon does not show up, run "Rescan" or you may have to select it under your Airport icon in menu bar for it to be recognized.
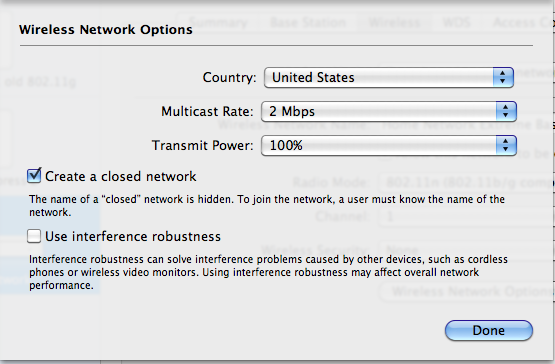
The first screen that appears has four tabs across the top: Summary, Base Station, Wireless, Access Control.
Review info in Summary Tab: Base Station Name, Base Station Status, Version, Serial Number, Airport ID, Ethernet ID and Wireless Mode, Network Name, Wireless Security, Channel, Wireless Clients, connect using, and IP Address
PLEASE take note of the Airport ID for this Main Base Station as it will be needed when setting up the Airport Express device. This Airport ID can also be found on the Airport Extreme base station as well. You will also need the Airport ID for the Airport Express device as well and it can be found in the summary for that item as well or physically on the unit.
Select Base Station Tab:
Enter a name for the Base Station or leave default name.
Enter a Base Station Password.
Select Remember this password in my keychain.
Left all other options as default.
To sign up for the radio service, go online at
Select Wireless Tab:
Initially used
Wireless Mode: Create a Wireless Network
Network Name: Leave same or enter your own network name
Radio Mode: 802.11n (802.11b/g compatible)
Channel: Automatic
Wireless Security: None
Wireless Password: blank
Verify Password: blank
Select Access Control Tab.
I did NOT change any settings.
At this point I made sure that the main base station Airport Extreme still worked with my other computers.
STEP 2:
Plug the Airport Express into a nearby wall socket.
Do NOT attach to the Mark IV Disklavier.
Run the Airport Utility program.
Select the icon that represents the Airport Express device.
Select Manual Setup button.
Review the Summary Tab and note the Airport ID for the Airport Express device as this will be needed when modifying the settings for the Apple Extreme in the next step (3).

Select Base Station Tab:
Enter a Base Station name or leave default if you wish.
Leave password "public" that is assigned to this Express device or enter a new one if you like.

Select Wireless Tab:
Change the Wireless Mode to "Participate in WDS network".
You should notice that a new tab labeled WDS then appears above in the row of tabs.
Wireless Security should be NONE.
Do NOT enter passwords.
Channel should be automatic

Select WDS Tab:
WDS Mode: Select WDS remote.
Enter the Airport ID for the Main Airport Extreme.

Then select "Update" button.
Your icon should have green indicator as well as the light on the actual physical base station should be green as well.
STEP 3: Now MODIFY the setup of the Airport Extreme in the following manner to set the Airport Extreme up as a WDS Main by following the steps below.
Select "Manual Setup" button.

Review the info in Summary Tab.

Select Wireless Tab:
Change the Wireless Mode to "Participate in WDS network".
You should notice that a new tab labeled WDS then appears along the row of tabs.

Select WDS Tab:
Make sure the WDS main is selected in the WDS Mode.
Allow wireless clients should be checked.
Select the + button to add the Airport ID for the Airport Express device that you obtained in Step 2. Enter the Airport ID and a description name.
Then select update.
If all goes well, you will get a message that this change has been successful.
Your icon should have green indicator as well as on the light on the actual physical base station should be green as well.

STEP 4:
Shutdown your Disklavier.
Unplug the Express device and move it near your Mark IV disklavier plugging it in a wall socket (the light should turn green).
Connect the ethernet cable from Mark IV Disklavier to the Airport Express.
Now reboot or turn on your Mark Disklavier.
Try connecting to the Disklavier Radio.
Note: Suggest selecting NONE when entering a Wireless Security Password.
REASON: I first set this Airport Extreme up to work with my computers and initially set it up with recommended WPA password. But one of my older Mac's could not access the internet or email using the WPA password security, because it was running an older system software. So I then changed to WEP password and all the other computers on my network in house worked fine, but my main Mac did NOT work correctly with this WEP password, nor did the Express hooked to Disklavier Mark IV. This is key and when I got up this morning I decided to remove the password and changed that option to "NONE". There are two passwords that are actually entered when setting up these devices one is password for network and the other is password to change the actual settings. I still have a password setup for the change of settings options for the Base Station. In other words, it is OK to put in a password for the BASE STATION tab options, but use NONE for the WIRELESS tab Security password. Tweet

