PDF is an acronym for "Portable Document File" and is a convenient format used for reading documents on all sorts of devices, regardless of application, device, or operating system you have.
There are many popular readers available to access and read PDFs from your iPad. In fact if a PDF is emailed to you, you can click on it from your Mail app and it will open and you will be able to read it. iBooks on the iPad is another good way to read PDF files and to store them for offline reading. Often times when we are traveling, we don't have convenient access to wifi services, and it is nice to have a way to read our stored PDFs to read whenever we wish.
How Can You Find PDFs
There are many PDFs already on the web. We just need to find them. The quickest way to find a PDF is to use Google Search from your Safari browser on your iPad. For example, if you want to find a reference manual for your iPad, you can google for it.
Type in a phrase like, "iPad 2 manual pdf" Using the additional word "pdf" will help find the file in pdf format.
The search results will appear in a list. The following result appears to be the best option as it is an Apple pdf file. Clicking on this result will bring up the pdf. Now, you can read the resulting pdf directly from your Safari browser; however, it may be something you want to keep as a reference for later. In that case, after the document has fully loaded into the browser page, simply tap twice with your finger on the pdf and an option bar will appear at the top of the page. The option to read/save in iBooks will be one of the options. If you select this one, your PDF file will be saved to your iBooks bookshelf. You will be able to access this document offline at any time.
Other Ways to Transfer a PDF to your iPad
Via Email. You can email a copy of a file by dragging it from your computer desktop to your new email window and send it to yourself. You can then retrieve it from your mail on your iPad and can save it from there. To save, merely open the PDF file while in your mail app by touching the opened file with your finger. Once open, you should notice a small square with curved arrow in the upper corner menu bar. If you tap on this icon you will be given the same option to open in iBooks. If you select this option, your pdf file will be saved in iBooks.
Via another app. Using GoodReader or Dropbox app one can transfer a pdf to their Mac. You merely drag the PDF into the GoodReader of Dropbox app on your Mac or PC. Then open the same app, either GoodReader or Dropbox on you iPad and select the document and option to transfer to iBooks. These methods do not require that you sync with iTunes. Using iTunes to sync books or pdf files is not always convenient.
There is a way to transfer PDFs via iTunes without having to sync
Connect your iPad to your PC or Mac via the cable and run iTunes app on your computer. In the left hand column you will see the name of your iPad under Devices. Select Apps tab at the top in the right hand window. Scroll down until you see the File Sharing section. Select either GoodReader of Dropbox from the list of apps that have file sharing capabilities on your iPad. Drag the PDFs into the list for that app on the right-hand side. They will appear on your iPad retrievable by the app.
Tweet
Showing posts with label iPad 2. Show all posts
Showing posts with label iPad 2. Show all posts
Wednesday, September 19, 2012
Wednesday, August 29, 2012
Alex Reads Me My PDFs
While on my treadmill, I try to do something productive to keep my mind occupied and less on the exercise. Lately I've been trying to read some pdfs of books or manuals while walking or cycling in the fitness center. I really like audio books as they are easier to manipulate, especially on the treadmill.
I have been pursuing the means to have my pdfs or books read to me. I have found that there are a couple of ways to accomplish this feat if you don't mind a robot reading to you.
First, I tried using the built in "voice over" option on my iPad. This entails enabling "voice over" in the Settings of your iPad. Under General, you will find "accessibility" option> triple click home button> which I set to "voice over." When you want something read to you on your ipad, you enable the voice over by hitting the home button rapidly in succession three times. When you do this, the other home gestures get really confusing. Selecting something then requires two clicks of home button instead of one. This can be frustrating at first. Usually I only turn this feature on after I have started iBooks.
Once I have iBooks running and have selected a pdf file to have read, I then triple click the home button turning on the voice over (which is a woman's voice). Then you have to select the first word or sentence (which can be tricky) and using two fingers swipe downward. The voice will start reading and continue through the article. It is pretty frustrating at times, but once it is engaged, works for the duration of my workout.
Today, I decided to try a different method. The Mac system allows you to select text in a pdf file that you load into Preview, and then to control click the selected text. You will see an option to send text to iTunes.

You have a choice of voices (I select Alex). You choose where to put the audio files in iTunes. I usually just put them in the Music section.

Generally, I select one chapter or a section of the pdf or book. I send each to iTunes. Using command I in iTunes you can enter the author's name, edit the chapter title, add a track number and any other information you wish like Genre: Books to each audio clip.

When I finish saving each track or chapter to iTunes, I then create a playlist, sorted by track to get them in order.

Next step is to move these files to a folder on your desktop. Using command-shift N, create a folder on your desktop. Now select all the files in the playlist and drag them to the new folder.
Note: I have set my iTunes preferences> devices> to NOT auto-synch my devices (ipods, ipads, and iphones).

Run iTunes. Connect your iPad to your Mac. Your iPad should show up under devices in the left-hand side of the iTunes window. Select Apps tab. YOU WILL NOT BE SYNCING.
To move the files to your iPad without having to sync your iPad is accomplished by using the File Sharing option available under the Apps tab. SCROLL DOWN to see this section.

I use the GoodReader app to read pdfs and also to access documents from Google Drive (Google Docs) and to also listen to audio files. When I scroll down in my Apps Tab, I see a list of apps that allow transfer of files from my Mac to my iPad/iPhone without having to sync my devices. It is especially nice to use this method to add files to your devices that are on your Mac laptops or other computer than the one you originally used to sync your device.
I select GoodReader from the left hand column and then see the files that are currently stored on my ipad in the right-hand section of the window. I then select all the files on my desktop in the newly created folder and drag them to this right-hand section. They are now quickly moved to my iPad. DO NOT click the SYNC button - it is not used to transfer these files!
I then eject my iPad using the small up arrow next to my iPad device name in the far left-hand column (under Devices) and disconnect my iPad. Whoala! I now have the audio files in GoodReader My Documents section and I merely click on the audio to listen to the book. Alex reads to me.
Tweet
I have been pursuing the means to have my pdfs or books read to me. I have found that there are a couple of ways to accomplish this feat if you don't mind a robot reading to you.
First Attempt - Using Voice Over with iBooks
First, I tried using the built in "voice over" option on my iPad. This entails enabling "voice over" in the Settings of your iPad. Under General, you will find "accessibility" option> triple click home button> which I set to "voice over." When you want something read to you on your ipad, you enable the voice over by hitting the home button rapidly in succession three times. When you do this, the other home gestures get really confusing. Selecting something then requires two clicks of home button instead of one. This can be frustrating at first. Usually I only turn this feature on after I have started iBooks.
Once I have iBooks running and have selected a pdf file to have read, I then triple click the home button turning on the voice over (which is a woman's voice). Then you have to select the first word or sentence (which can be tricky) and using two fingers swipe downward. The voice will start reading and continue through the article. It is pretty frustrating at times, but once it is engaged, works for the duration of my workout.
Second Attempt - Audio Created Using Cntl Clicking Selected Text
Today, I decided to try a different method. The Mac system allows you to select text in a pdf file that you load into Preview, and then to control click the selected text. You will see an option to send text to iTunes.

You have a choice of voices (I select Alex). You choose where to put the audio files in iTunes. I usually just put them in the Music section.

Generally, I select one chapter or a section of the pdf or book. I send each to iTunes. Using command I in iTunes you can enter the author's name, edit the chapter title, add a track number and any other information you wish like Genre: Books to each audio clip.

When I finish saving each track or chapter to iTunes, I then create a playlist, sorted by track to get them in order.

Moving Audio Files to My iPad without Syncing
Next step is to move these files to a folder on your desktop. Using command-shift N, create a folder on your desktop. Now select all the files in the playlist and drag them to the new folder.
Note: I have set my iTunes preferences> devices> to NOT auto-synch my devices (ipods, ipads, and iphones).
Run iTunes. Connect your iPad to your Mac. Your iPad should show up under devices in the left-hand side of the iTunes window. Select Apps tab. YOU WILL NOT BE SYNCING.
To move the files to your iPad without having to sync your iPad is accomplished by using the File Sharing option available under the Apps tab. SCROLL DOWN to see this section.
I use the GoodReader app to read pdfs and also to access documents from Google Drive (Google Docs) and to also listen to audio files. When I scroll down in my Apps Tab, I see a list of apps that allow transfer of files from my Mac to my iPad/iPhone without having to sync my devices. It is especially nice to use this method to add files to your devices that are on your Mac laptops or other computer than the one you originally used to sync your device.
I select GoodReader from the left hand column and then see the files that are currently stored on my ipad in the right-hand section of the window. I then select all the files on my desktop in the newly created folder and drag them to this right-hand section. They are now quickly moved to my iPad. DO NOT click the SYNC button - it is not used to transfer these files!
I then eject my iPad using the small up arrow next to my iPad device name in the far left-hand column (under Devices) and disconnect my iPad. Whoala! I now have the audio files in GoodReader My Documents section and I merely click on the audio to listen to the book. Alex reads to me.
Tweet
Saturday, August 25, 2012
Solution for Transfering Photos from iPad to Computer and Back
When transferring photos between your mobile devices like iPad and iPhone or to your MacBook Air and back, you need to consider the amount of time and bandwidth or data transferred via the cloud. As an alternate solution, one should consider one of the excellent apps available to do this efficiently and seamlessly.
How It Can Be Accomplished with PhotoSync
PhotoSynch is such an app available for the Mac and also the iPhone/iPad devices. PhotoSync allows synching photos in both directions without hassle, using an easy-to-use interface, which allows transfer of all photos or a selection of photos.
* This transfer from device to computer and computer to device can be accomplished via a wireless connection or 3G/LTE. The device to device transfer is available using bluetooth and wifi.
* The number of photos you plan to transfer can be limitless, but I haven't tried that yet.
* You can share photos to other sites such as Facebook, Dropbox, Picasa, and others like Google Drive (the new Google Docs).

* It also has Web Browser viewing capabilities where you can view your photos in a web page from a computer on your same network.
* Transfer is done in the background, allowing iPhone and iPad users to continue with phone calls or games.
* You can select the size to send, which computer to use as your default storage.

* You can setup defaults in the settings of the app for quick transfers and also choose to send to a certain folder or to iPhoto on your computer directly when receiving or sending photos.

Support for Mac and Windows Companion App
The iPad/iPhone app is relatively inexpensive for your iPad/iPhone and comes free for use on your desktop or Mac laptop (Mac OS X10.5 or higher Intel and PPC supported). There is also a Windows PhotoSynch companion app that works for those using a PC as their default computer (Windows XP SP 2 or higher, Windows Vista or higher, Windows 7). Location services needs to be enabled in order to use the app successfully.
For those who don't want to use a cloud server or have limited wifi capability or your internet connection is down this is a great solution as it offers a means to transfer photos and videos between devices and computers using a local network. I give PhotoSync a thumbsup rating of 5 stars for all my fellow travelers and photographers.
Tweet
Saturday, August 04, 2012
My iPad app purchases were missing
I tried viewing all my APP purchases on my iPad 2 tonite. There was only a blank screen showing under all, iPhone, and iPad sections when I ran the "apps" store app on my iPad.
When I tapped anywhere on the blank screen, one of my purchases would appear. I tried rebooting my iPad, checking various settings.
Finally, I realized that I had an iTunes U podcast that was stuck or not downloading on my Mac Air. There was a little number "1" in a red notification circle next to the iTunes U label in iTunes on my Mac Air. So I deleted this file that had not downloaded properly into my iTunes library.
Checked my iPad and all my apps purchased are now showing up fine.
So if you are experiencing this problem, make sure an app, podcast or download is not stuck in your iTunes library on your computer. This seems to have been the problem. Hope this helps someone else with this problem. :-) Tweet
Thursday, August 02, 2012
How to Get an ePub Book onto My Mac
Today's journey involves transferring a free ePub book that I found online at Google Books to my iPad. Searching online for a good book about the Northwest Passage, I found one published in 1860, by James Alex Browne, called "The Northwest Passage and the Fate of the John Franklin."
It was an easy step to download the ePub file to my Mac's hard drive. The next step was a bit challenging. It seemed logical to me that I might be able to email it to myself, retrieve it from the inbox on my iPad and save it directly to iBooks app on my iPad. That didn't seem to work for me. Possibly it was due to my lack of coherence and coffee this morning. I tried other apps like Free Books and GoodReader. Nothing seemed to work.
Finally, I pursued the use of my Dropbox app. I moved the ePub file into the cloud in my Dropbox by opening a finder window and physically dragging the ePub file to my Dropbox. Once the file was located conveniently in my Dropbox in the cloud, I was able to select the Dropbox app icon on my iPad, next select the ePub file, and a popup selection box appeared on my iPad.

It was easy from there to add it to my iBooks library collection or into Free Books or GoodReader.
Tweet
Tuesday, November 22, 2011
iMessage Solution for Activation
iMessage suddenly quit working on my iPad 2 and iPhone 3GS, yesterday. I am traveling and was very frustrated with the fact that I was not able to iMessage from overseas. As it turns out, I tried everything. I updated my iPhone to OS5.0.1, but left the iPad at 5.0 (just in case). I tried reboot, repowering and even reset my apple id and password. All that did not work.
As I was forced to change my password to meet the new 8 character, capital, number format - this caused panic in accessing emails, mobile me and other things. Resolved those issues, but iMessage still would not verify or activate. I tried resetting Facetime settings, iMessage settings and numerous other settings.
Alas, the solution was to turn off location and set my time zone to automatic. I have had to adjust the timezone manually as I am traveling and do not have satellite access all the time.
This works, finally my iMessage and Facetime were activated.
Hope this helps someone else. Suggest making sure your time zone is correct before trying to verify or activate before changing a bunch of settings and passwords. Tweet
Sunday, October 16, 2011
Some Great New Features in iOS 5 - be sure to check them out
Here are some features worth checking out on your mobile devices using iOS 5:
• Creating albums and moving photos into albums
• Video formats that are now supported on the device
• Setting individual text tones for your family and friends
• Setting up iMessage to use for FREE texting to fellow iphone/ipad users
• Setting up special vibration tones for you iPhone
• Enhancing photos right in the Photos app: also rotate, crop and red-eye elimination
• New app for reminders tat can be synced across devices. Reminders can send alert when you are near a location.
• Accessing magazines on a newstand shelf.
• Tabs in Safari on your iPad devices
• Set up custom gestures and keyboard shortcuts
• New search features in Mail app
• New Reader in Safari to bookmark and read articles later.
• Use your volume button as a shutter button for your camera. Access camera from the lock home page.
• Swipe to view all your notifications and alerts and text messages and email subject titles from one central location. On iPhone also see stock and weather in this notification window.
• More gestures, wifi sync, pc free, icloud capable photo streaming, find your friends, airplay ....
• and text style like bold, underline, italic and suggestion for spelling in Mail app Tweet
Thursday, October 13, 2011
iOS 5 Tip: Don't Overlook the New Alert Sounds
The new iOS 5 for our mobile devices now includes the ability to set special sounds or tones for your alerts. Check out the Settings > General> Sounds> now available to customize.
 Tweet
Tweet

iOS 5 Tip: Create Your Own Gestures on Mobile Devices
For those who want to get creative with gestures they use on their iPad or iPhone, try selecting the Settings> General>Accessibility> Assistive Touch> Custom Gestures > Create New Gesture.


Your new gestures are recorded and accessed through a Favorites Menu. Tweet


Your new gestures are recorded and accessed through a Favorites Menu. Tweet
iOS 5 Tip: Creating Your Own Keyboard Shortcut on iPhone, iPad
You can create your own keyboard shortcuts by going to the Settings on your iPhone or iPad that has been updated to iOS 5.
Select the Add Shortcut, enter some keys and the corresponding message or phrase that will replace that text shortcut when you type a message or note.

 Tweet
Tweet
Select the Add Shortcut, enter some keys and the corresponding message or phrase that will replace that text shortcut when you type a message or note.


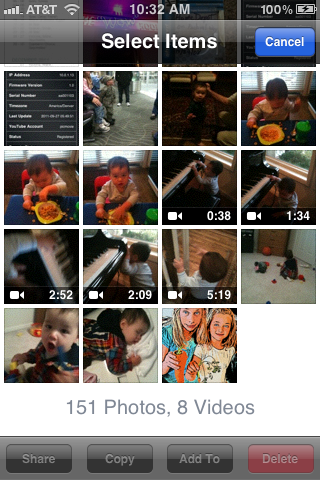
Making An Album and Adding to Existing Album with iOS 5 Devices
With the new iOS 5 for iPhone and iPad devices, comes some pretty cool features for photos. We've all wanted to be able to make albums on our iPhones and iPads and now we can do so.
Select the photo app icon on your device which brings up your camera roll of photos. Select the curved/share icon on the right side upper bar and then select the photos you wish to put in a new album or to put in an existing album.
 If you select the option to create a new album, you will enter the name for that album and those photos will be organized in that new album. You, will also be given an option to put photos in an existing album and you merely select the name of the album where you place these photos.
 Also with the iCloud option implemented your photos will be 'streamed' to the cloud and all your devices for seamless backup and access. I haven't impemented the iCloud as yet. If you connect your camera to your device via a camera connection kit, the photos will be automatically handled by the cloud if that option has been selected.
All of this seems to be pretty confusing at first, but Apple has some support documents or how-to's posted for situations that might arise. Check here for How to Reset Your Photostream and How to Remove photos from devices, Macs and PCs. Tweet
Select the photo app icon on your device which brings up your camera roll of photos. Select the curved/share icon on the right side upper bar and then select the photos you wish to put in a new album or to put in an existing album.

All of this seems to be pretty confusing at first, but Apple has some support documents or how-to's posted for situations that might arise. Check here for How to Reset Your Photostream and How to Remove photos from devices, Macs and PCs. Tweet
Saturday, September 03, 2011
Just returned from a great trip to Europe visiting Germany, The Netherlands, Belgium and France. The weather started out rainy in Germany and The Netherlands, but eventually the sun did come out and the temperatures during the entire trip were pleasant and tolerable for summertime.

I used the iPad 2 to keep track of all my documents, itineraries, maps, phone numbers and travel plans. I also had my iPhone along, but found the handy iPad screen to be easier to see and zoom in on the various city maps. I kept my iPhone in airplane mode and used only with wifi connections to avoid any large data download fees that would be associated with 3Gs network mode. I felt confident that if needed for that emergency call, that it could be retrieved from my pocket and used. My son also reminded me that I could always use a hotel or restaurant to call a cab when needed.
My husband had purchased the maps for Europe for his handheld GPS unit. On the occasions when I didn't go along with him and my daughter, they managed to get lost. Once he forgot to turn off the GPS unit while they were out exploring Amsterdam's many museums. They walked in the wrong direction when leaving the museum only to realize that my daughter had dropped her paper map somewhere along the walk, and he had no power left to consult his GPS. When I was along, I was able to wake up my iPad, run GoodReader app where I had conveniently downloaded the city maps in pdf form for offline viewing. We were always able to find our way.

I find that the best way to travel is to pre-plan by finding city maps, travel ideas and such from the internet sites and uploading these to Google Docs. I am then able to download these to my devices as needed for the cities that we visit using wifi or pre-load all of them prior to leaving the US. I also kept my other itineraries for accommodations and travel loaded for easy access. All the important confirmation numbers an such were very easy to access online or offline from my iPad or iPhone. If you have the mobile me email account, you can also email any pdf files to yourself before you leave and have access to those documents offline as well from your iPhone or iPad. I would have liked to use my iPhone with some of the travel apps I had downloaded while out and about, but didn't want to take a chance on incurring large fees on my phone bill, so I studied suggestions while using wifi in advance of the days outings.
We all downloaded an mp3 guide to the Louvre Museum and tried using our headsets to listen to the tour while exploring the museum. The Louvre is a great museum to see and we saw Mona and Venus, the two attractions that draw the most crowds. Everyone was crowded around the Mona Lisa trying to take an iPhone photo alongside. The number of iPhones I saw on this trip was astounding.


Here is a photo, my granddaughter took while in The Louvre Museum with my iPhone - she called it - "Baby World."

Tweet

I used the iPad 2 to keep track of all my documents, itineraries, maps, phone numbers and travel plans. I also had my iPhone along, but found the handy iPad screen to be easier to see and zoom in on the various city maps. I kept my iPhone in airplane mode and used only with wifi connections to avoid any large data download fees that would be associated with 3Gs network mode. I felt confident that if needed for that emergency call, that it could be retrieved from my pocket and used. My son also reminded me that I could always use a hotel or restaurant to call a cab when needed.
My husband had purchased the maps for Europe for his handheld GPS unit. On the occasions when I didn't go along with him and my daughter, they managed to get lost. Once he forgot to turn off the GPS unit while they were out exploring Amsterdam's many museums. They walked in the wrong direction when leaving the museum only to realize that my daughter had dropped her paper map somewhere along the walk, and he had no power left to consult his GPS. When I was along, I was able to wake up my iPad, run GoodReader app where I had conveniently downloaded the city maps in pdf form for offline viewing. We were always able to find our way.

I find that the best way to travel is to pre-plan by finding city maps, travel ideas and such from the internet sites and uploading these to Google Docs. I am then able to download these to my devices as needed for the cities that we visit using wifi or pre-load all of them prior to leaving the US. I also kept my other itineraries for accommodations and travel loaded for easy access. All the important confirmation numbers an such were very easy to access online or offline from my iPad or iPhone. If you have the mobile me email account, you can also email any pdf files to yourself before you leave and have access to those documents offline as well from your iPhone or iPad. I would have liked to use my iPhone with some of the travel apps I had downloaded while out and about, but didn't want to take a chance on incurring large fees on my phone bill, so I studied suggestions while using wifi in advance of the days outings.
We all downloaded an mp3 guide to the Louvre Museum and tried using our headsets to listen to the tour while exploring the museum. The Louvre is a great museum to see and we saw Mona and Venus, the two attractions that draw the most crowds. Everyone was crowded around the Mona Lisa trying to take an iPhone photo alongside. The number of iPhones I saw on this trip was astounding.


Here is a photo, my granddaughter took while in The Louvre Museum with my iPhone - she called it - "Baby World."

And of course, on the ten hour flight from the US to Europe and back, the granddaughters were easily entertained with Talking Tom, coloring apps and some favorite games. They also texted messages from the ship to their family while using wifi and the TextFree app. The ship we were on had excellent wifi coverage, so we were always connected via iPad, iPhones and MacBook Airs.
As I sit here today, I am longing for the new iOS 5 that will allow me more features for my future travels. I am envisioning that life abroad can be entirely possible if I am able to stay connected to family, friends and the internet.
Tweet
Sunday, June 26, 2011
Will You Be Walking on Cloud 9?

I remember back to third grade when I was first introduced to cloud terminology. Even though this has been many many years ago, I still remember the words Cumulus, Altostratus and Cumulonimbus and Cirrus. Each of the terms brings to mind a picture of a type of cloud like a puffy cloud, a thin or wispy cloud or a rain cloud. The terminology can also relate to the cloud's position in the sky. Alto referring to those clouds in the middle of the sky at an altitude of 6000+ to 20000 feet, a Cirrus cloud that lies above 18,000+ feet, or a Stratus or Stratocumulus cloud that is located below 6,000 feet.
Today, I ponder all the new cloud terminology in hopes that it can be visually represented and as easy to learn. Since the hottest topic today seems to be cloud computing, it might be good to review the terminology around this newest phenomena. So here goes, my interpretation:
A cloud or residing in the cloud is a term used for a place to store your stuff like documents, photos, music, and so on. This is a concept that most MobileMe users understand, at least those that have used the iDisk from Apple in the past few years.
Cloud Computing is the ability to use combined applications and services provided by data centers in the cloud. For example: those who use a service like Google mail or Yahoo mail online are already using cloud computing. You are using a mail application from the service provider either Google or Yahoo. Ideally, A large corporation or individual that uses these services, does so without having to employee a special IT group to maintain the application or worry about storage. Another advantage is that the mail is accessible from anywhere and anytime, as long as you can access the cloud or the internet.
I definitely remember the time my son informed me that this phenomenon was coming, that was at least 20 years ago. It is here and has been for awhile. Most of us have already experienced the cloud and cloud computing in some form already.
Many questions will be hashed about and analyzed. Will it simplify the way we access, store and handle our data? Will we have a means to backup data, access data and save data securely? Will we be able to manipulate this data using shared applications based in the clouds? Will these applications be maintained and upgraded seamlessly without any of us worrying about taking care of these things ourselves? What will be the costs for services, costs for maintaining, reliability and security issues, and how will we access and share data with others? If we all move to the cloud, will the immense amount of data (e.g. Big Data Theory) be unlimited and infinite?
The final question to ponder - Have you made your moving plans yet? Many of us will be looking for the right cloud to meet our needs. Those of us who have iWeb sites and MobileMe Galleries will need to move our stuff in a year's time to a secure cloud. Where and what Cloud have you decided to use? Will you be walking on Cloud 9?
Credits: Photo taken by my husband, from an airplane over South Africa. Tweet
Thursday, May 05, 2011
Remembering the PRINT "HELLO" Days - Exploring Basic! App
Last night I downloaded the iPad app called Basic! from the iTunes store to our iPad. It brought back so many memories of the days I spent standing in line at the University of Texas, waiting to submit keypunch cards for an assignment. My husband and I explored this app, inputting and running some simple BASIC programs on the iPad, tapping RUN and watching the results as they appeared on the iPad screen.

We were able to recall some of the early basic commands like IF THEN, FOR NEXT and we even played with some of the more sophisticated commands like COLOR, PLOT and LINE. The app also supplies a list of commands by type. The Editor and Terminal mode are easy to use. The app has several coding examples built in and also allows you to save quite a few of your own programs within the app itself. There demo programs are pretty good and by jarring our memory we were able to do some pretty nifty stuff on the iPad screen. I'm sure there are quite a few 35 to 40 year old men and women that remember writing some of their first code to PRINT "Hello" on their first Apple or Radio Shack or Commodore or Amiga desktop computers.
As we programmed we couldn't help but remember that we had lived in a marvelous time, experiencing almost the entire computer revolution from the huge mainframes at UT to the Macs of today. We recalled
... the keypunch days - the agony of waiting in line to submit keypunch cards that took days to get back.
... the times that we had a keypunch typo and standing in line to resubmit the cards
... the stress of not having our program assignment finished by Friday, because the mainframe went down. Such agony and stress.
... our first Apple II, equipped with a tape input device
... to the evolution to today's methods of wireless transfer of data, cloud technology
... and now iPads that you can use while lounging in bed or traveling the world.
I am so excited about this app, that I am going to try to find some old programs to run on my iPad. If you ever wrote software or dabbled on some of the first computers running BASIC, I suggest trying out this fun app! iTunes Link Here. Tweet
Tuesday, May 03, 2011
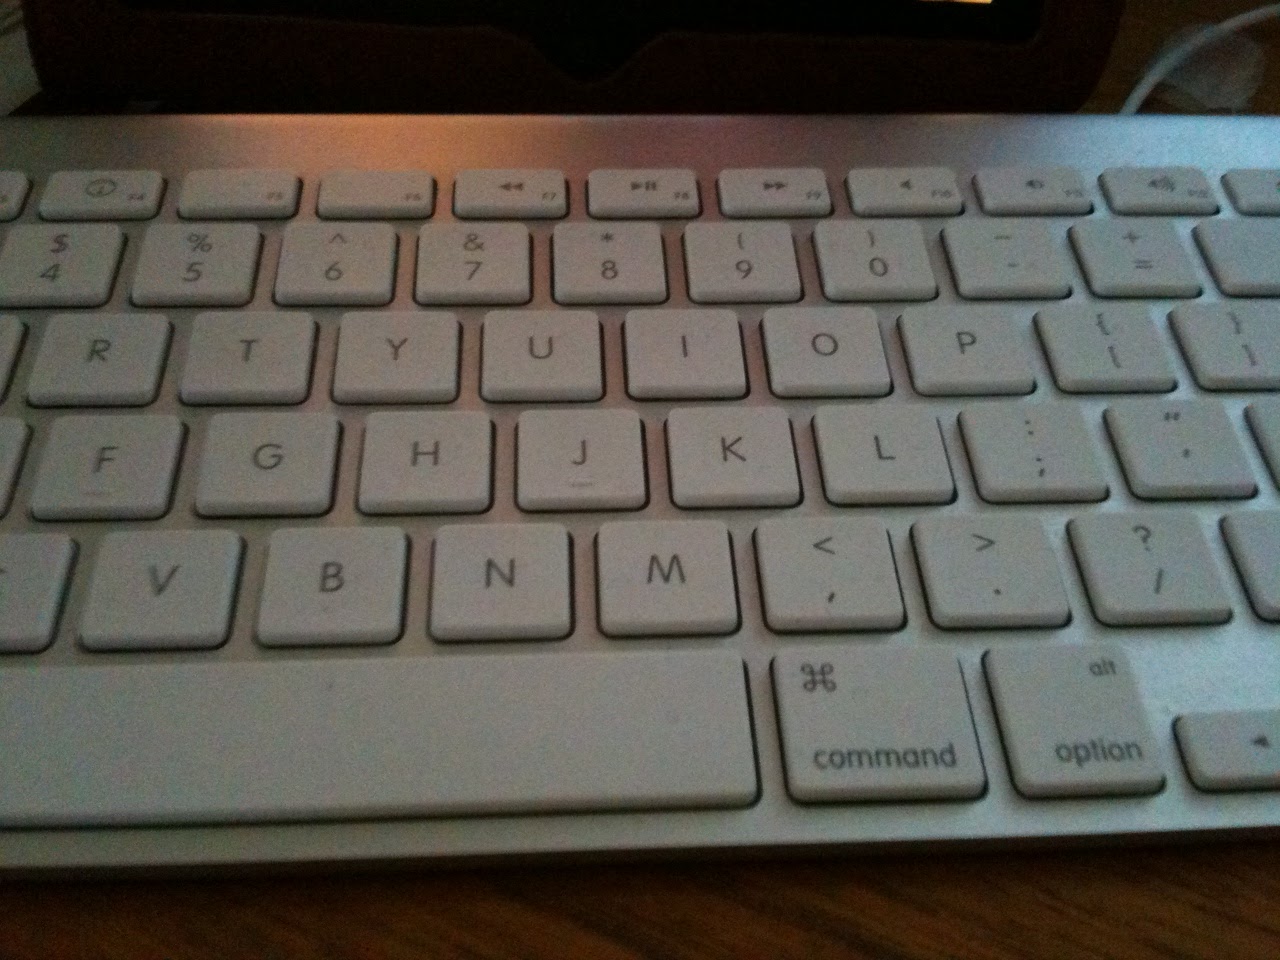
Bluetooth Keyboard Shortcuts That Work with iPad/iPhone Devices
If you use an iPad for any type of writing or journaling, you probably use Apple's wireless bluetooth keyboard. I decided to post a list of some of the keyboard shortcuts that work with the keyboard bluetoothed with an iPad or iPad 2 or even your iPhone.

To pair your keyboard with your device, select General>Bluetooth in the Settings options. Turn bluetooth ON and also turn on your bluetooth keyboard by pushing in the button on the keyboard that is located on the upper right-hand side of the physical keyboard. Your mobile device will try to discover the bluetooth keyboard and once that it finds the keyboard, a dialog box requesting you to enter a PIN number on your keyboard will appear on the screen. Once the PIN has been entered, be sure to hit the return or enter key. You should then be connected and can start typing away.
Keyboard Shortcuts for Controlling Device Settings:
F1 - decreases the brightness on the device screen
F2 - increases the brightness on the device screen
Space Bar - when your screen has gone to sleep will wake it up.
If you want to play some iPod app music in the background while you type
F8 - play or pause media
F9 - navigate forwards for media playing, next song
F7 - navigate backwards for media playing, previous song
F10 - mutes the media
F11 - decrease the volume for the media playing
F12 - increase the volume for the media playing
Option (or Cmd or Shift or Cntrl) + F9 - skips to the next album
Option (or Cmd or Shift or Cntrl)+ F7 - returns to the previous album
Keyboard Shortcuts for Selecting Text or Moving within text paragraph or document:
Cmd A - Select All
Cmd C - Copy Text
Cmd X - Cut
Cmd V - Paste
Option + Delete - delete entire words one at a time to the left of the cursor
Cmd Z - Undo
Shift + Cmd + Z - redo
Shift + Right Arrow - selects/deselects letter by letter moving to the right
Shift + Left Arrow - selects/deselects letter by letter moving to the left
Shift + Up Arrow - selects/deselects text when moving up
Shift + Down Arrow - selects/deselects text when moving down
Option + Shift + Right Arrow - allows you to select/deselect text word by word when moving right
Option + Shift + Left Arrow - allows you to select/deselect text word by word when moving left
Option + Shift + Up Arrow - allows you to select/deselect text line by line when moving up
Option + Shift + Down Arrow - allows you to select/deselect text line by line when moving down
Cmd + Up Arrow - move the cursor to the beginning of document
Cmd + Down Arrow - move the cursor to the end of document (also works with Cntrl)
Cmd + Right Arrow - move the cursor to the end of the line (also works with Cntrl)
Cmd + Left Arrow - move to the beginning of the line
Tab - indents the text
Right, Left, Up and Down Arrows - will move the cursor in the body of the text
Eject Button (top row right-hand side of keyboard) - disconnects bluetooth keyboard to allow accessing the virtual keyboard on the device
Cmd + Spacebar - select a different (International) keyboard if one has been added to the list of available keyboards in the General Settings for the device.
Keyboard Shortcuts to Yield Special Symbols - Using option key and letters/numbers yields special symbols, and using option shift and a letter/numbers produces some additional symbols. Option w - yields the symbol ∑
Option r - yields the registered trademark symbol ®
Option d - yields the symbol sigma ∂
Option p - yields the symbol for pi π
Option g - yields the symbol for copyright ©
Option 2 - yields the symbol for trademark ™
Option x - yields the symbol for approximately equal to ≈
Option v - yields the square root symbol √
Option k - yields the degree symbol ˚
Option 4 - yields the cent symbol ¢
Option j - yields the delta symbol ∆
Option , - yields the lesson than and equal to symbol ≤
Option . - yields the greater than and equal to symbol ≥
Option / - yields the division symbol ÷
Option n + (then release option key) followed by letter n - yields the ñ
Option e = (then release option key) followed by letter e - yields é
Option ` = (then release option key) followed by a or e or i- yields à and è and ì
Option 5 - yields the infinity sign ∞
Option 8 - yields the bolded bullet •
Option ; - yields the ellipse symbol (3 dots in a row) …
Option b - yields the integral symbol ∫
Option 1 - yields the upside down exclamation point ¡
There are also a number of symbols that can be typed when using the shift key along with the option key and a letter/number
Option + Shift + k - yields the apple symbol
Option + Shift + 3 - yields the less than symbol ‹
Option + Shift + 4 - yields the greater than symbol ›
Option + Shift + letter o - yields the null symbol Ø
Option + Shift + 2 - yields the Euro symbol €
Option + Shift + equals symbol = - yields the ± symbol
Option + Shift + left bracket [ - yields the right double quotes ”
Option + left bracket [- yields the left double quotes “
Option + Shift + right bracket ]- yields the right single quote ’
Option + right bracket ] - yields the left single quote ‘
Option + Shift + front slash / symbol - yields the upside down question mark used in Spanish ¿
Presently, not all keyboard shortcuts work with the iPad and iPhone, such as some important ones for bold, italics and other text formatting within apps. Not all apps will allow using the keyboard shortcuts. The trick of hitting the space bar twice to add a period and start a new sentence does not work.
Tweet
Sunday, May 01, 2011
MacBlend's 101 Keyboard Shortcuts App for iPhone/iPad
It is always handy to have a list of keyboard shortcuts to use while using a Mac computer. One of my Twitter friends and Seattle's Mac guru, MacBlend has a great app that supplies you with 101 Keyboard Shortcuts and a quiz to test you on what you learn.


Matt at MacBlend, also provides training sessions in person or via video chat training using innovative means to learn all about your Mac computers. He has a great site which has lots of useful information. You might want to check out his clever videos under the MacBlend TV tab and his FREE eBook entitled "20 Ways to Save Time on Your Mac". I highly recommend following his blogs and check out his site to schedule a coffee session for some useful tips and guidance in making the best of your Mac computer.
I look forward to the future MacBlend apps and updates. I am hoping that he will add in some search capabilities to help find a specific shortcut within the 101 Keyboard Shortcuts for Mac, or possibly a reference list by Mac App or type of keyboard grouping. For example, it would be nice to have a section of just those screen capture keyboard strokes together on one screen or to pull them up if I searched by tag "screen capture". Tweet
Saturday, April 30, 2011
A StarTrek Transporting of Photos/Videos using PhotoSync App
Some iPad 2 users are looking for ways to transfer their videos captured with their iPhones to iMovie app loaded on their new iPad 2. One solution is to sync the video to iTunes from their iPhone and then resync to their iPad 2. Another solution requires the purchase of the camera connection cable. With the cable one can connect the iPhone to the iPad and transfer the videos directly.
I decided to try out using an app called PhotoSync as it is advertised to wirelessly transfer photos and videos between the two devices, as well as your computer.
The user can easily transfer from the devices to their computer over Wi-Fi. You can download selected videos and photos to and from your Mac using the FREE companion PhotoSync app available for Mac OSX . (A Windows Companion is also available for Windows XP SP2 or higher). I am always amazed at how these wireless transfers seem to be magic and feel as though I have witnessed a StarTrek transporting. PhotoSync preserves the Exif data, GPS data and file data for photos and videos, as well as support for RAW images and photos/videos.


Using PhotoSync with Bluetooth or WiFi if available, one can also transfer photos and videos directly from device to device. I was able to transfer video and photos from iPad to iPad and iPhone to iPad and iPad to iPhone in a snap. The transfer rate is 2.5MB/sec depending on your network and device. Also supports DropBox and Flickr accounts and transfer to iPhoto and Aperture.
If you are looking for an easy and fast way to transfer instantly to your devices and computer without using iTunes or cables, I highly recommend getting the PhotoSync app from the iTunes App Store. You only need purchase once and use for all your devices. Click here to access PhotoSync website Tweet
Wednesday, April 27, 2011
iPad 2 Case - All in One
I had mentioned in an early blog, that I would possibly be making some sort of case for my new iPad 2 and posting the photos of the case here in the future. After scouring the internet for cases that would work for my needs, I ran across the Happy Owl Studio Site.
This site offers a variety of cases for the original iPad. One of the cases The Clutch in Red, caught my attention. With the recommendations from members on the Yahoo iPad Forum, I decided to order one. My iPad 2 does fit effectively in the opening and the front facing camera is accessible, as well as the volume control, sleep button, microphone/earphone jack and USB connection for charging and syncing. The only feature that is not readily accessible without removing the iPad from the case is the rear facing camera. I suspect that with a leather punch tool that is in my husband's toolbox in the garage I could remedy that accessibility. Presently, I take videos and camera shots by using my iPhone and very seldom use the iPad 2 for that purpose. If I need to take a photo or video with my iPad 2, I will remove it from the case.
The case had that weird leather smell that is usually present after purchasing a new car that has leather seats. That smell has dissipated. The red leather is a nice quality, the adjustable strap attaches to the clutch with silver fasteners that are easy to connect and disconnect. The clutch folds in various ways to provide landscape, portrait and slight incline for typing modes for use with the iPad 2. The inside of the case that faces next to the exposed iPad screen is made of a nice soft red felt like material and proves to provide adequate protection against scratches. There is a zipper compartment that expands and provides slots for credit cards, a pocket for an iPhone without a case, a loop for pen, another center zippered compartment and two side sections. (My iPhone in its red leather case doesn't fit, but there is room for the iPhone inside the side sections of that zippered compartment.) Overall it is a compact, attractive case that serves as a protective case, versatile stand, that contains a place to keep cords, pen, iPhone, credit cards and headset and possibly a folding bluetooth keyboard. You can use it as a clutch or with the adjustable strap can sling it over your shoulder.


I was so pleased that I ordered a third one in black. I also ordered one in the turquoise leather color for my daughter, who will use it for the original iPad that I will be giving to her.
This same company offers The Wallet in Black or Brown, which is a nice alternative for men who want a stylish case that offers a zippered compartment for accessories and a case that has stand options. They also are expecting a case that will be specifically for the iPad 2. Tweet
Friday, April 22, 2011
Addictive Game of Quotes Phrase Phrenzy - Fun iPad App

Just got back from short trip to test drive the new car and to play some Black Jack. While on my trip, I had the opportunity to try out a new app, Phase Phrenzy for iPad, by New Wave Digital.
Phase Phrenzy is a clever new game that tests your ability to remember some famous quotes and phrases from authors, books, movies, politicians and TV shows. It has a well-designed interface that allows you to drag little word magnets on the notepad on the refrigerator background. You have to place the word magnets in the correct order to form the well-known phrase or quote. You are given more words than are needed. There are three levels for challenging puzzle types: Easy, Medium and Hard. You are also timed. To go to the next quote, you must beat the timer. The timer also has hints. Each time you use a hint, you suffer a time penalty - losing valuable time to complete the quote.
The Easy and Medium level offers some words of the phrase. The Hard level does not; you have to fill in the phrase from the word magnets without any context provided. The punctuation is provided in the phrase, but none of the words are capitalized thus making it a little more challenging to pick the right words. Once you have the word magnet in the right spot in the phrase, it sticks to that spot.
The only recommendation I would have since this is an iPad game is to use a larger font size for the word magnets. The overall game play is fun and addictive and challenging.
I would recommend this exciting new type word game for some great addictive fun. It is a great game for kids as well and not only provides fun, but also introduces them to some great quotes. The game has over 1000 quotes and can provide hours of fun.
I loved playing this game!
You can download the app from the iTunes App Store by clicking here.
To visit the website, click here. Tweet
Monday, March 28, 2011
How to Get Previous Video into Camera Roll to Edit with iMovie on iPad 2
I am still playing with the new iMovie app for iPad 2 and have noticed several things.
iMovie seems to import or load only videos that are stored in the Camera Roll section of the Photo Album on iPad 2. Some have assumed wrongly that you can only edit movies you made using the video camera function on the iPad 2. I have been playing with various means to edit video that I have in the Movie tab of my iTunes library that are viewable on my iPad 2 but are not located in the Camera Roll section.
It is probably a good idea to make sure that the video or movie you wish to edit with iMovie app on your iPad 2 is in the proper format for viewing on iPhone. As we all know, iTunes can handle this conversion for us by selecting our video movie and then Advanced>Create iPod or iPhone Version from the menubar in iTunes.
 I figured out a way to get this movie that I have in iTunes library into my camera roll. Drag the movie from iTunes to your desktop and then into an email as an attachment. Email this to one of the existing accounts you have setup on your iPad 2. (Note: This is a way to get photos or videos to and from your iTunes or Mac without having to sync your device to your Mac and iTunes).
 Once you receive the email on your iPad 2, select the attachment icon in the body of the email (allow the movie to fully load in your email window) and then click on the curved arrow in the upper right hand corner of the email display page. You will be given a choice to 'Save Video'. This option will save the video to the camera roll section of photo album on your iPad 2.
 Now, you will be able to run the iMovie app on your iPad 2 and access this video for your project. You click on the + to create a new project then tap the upper screen or select the square movie icon to bring up the available video clips to edit from your camera roll. You then click on the video clip you wish to edit and then the arrow to download it into the frame for editing.

As I explore iMovie, I will post tips and things here on my blog periodically that I discover. There seems to be a lot of things to explore and frustration by users in getting some of their previous videos from other devices into the camera roll to edit. Personally, I see the primary function of the iPad 2 video camera and iMovie app for editing an occasional movie that I might take on the iPad 2, but for any serious editing of longer movies that I might take with a video camera I would probably use iMovie on my Mac which has so many other features readily available. Not sure if Apple intends to add more features to the app, but I secretly hope so as well.
One of the other things that I learned in my exploration of iMovie today is that you should also have the location set to ON in your Settings on your iPad for iMovie to be able to access your camera roll.
In addition, I emailed a movie from Talking Tom app of the cute cat from my iPad 2 to myself. I then saved the movie to the camera roll from the email, but it did NOT show up in the list of videos that I could edit. It seems that the format that came directly from Talking Tom app was not set to the format needed by iMovie. So I dragged the video into iTunes and then using the Advanced>Create iPod or iPhone Version from the menubar in iTunes to convert it to a format that would work with iMovie app. I then dragged Talking Tom converted video to my desktop and then emailed it back to my iPad 2 and saved to camera roll. I was then able to edit the Talking Tom video, adding a music theme and title.
TEST: I recorded a brief video using my iPhone 3GS and emailed it from the iPhone 3GS to an account that I could access on my iPad 2. I then accessed the email on my iPad 2, allowing time for the video to load in, I then clicked Save Video (which went to my Camera Roll). I was able to load that video into the iMovie app on my iPad 2 and created a new project, adding theme music and title. While doing this edit, I discovered if you tap on one of the audio tracks in the movie timeline, you can adjust the volume of each one.
Once the videos were edited, I uploaded both of these last two videos to YouTube using iMovie share option on my iPad 2. The uploads seemed to work fine if I selected Public. I had problems uploading them as Unlisted. Tweet
iMovie seems to import or load only videos that are stored in the Camera Roll section of the Photo Album on iPad 2. Some have assumed wrongly that you can only edit movies you made using the video camera function on the iPad 2. I have been playing with various means to edit video that I have in the Movie tab of my iTunes library that are viewable on my iPad 2 but are not located in the Camera Roll section.
It is probably a good idea to make sure that the video or movie you wish to edit with iMovie app on your iPad 2 is in the proper format for viewing on iPhone. As we all know, iTunes can handle this conversion for us by selecting our video movie and then Advanced>Create iPod or iPhone Version from the menubar in iTunes.


As I explore iMovie, I will post tips and things here on my blog periodically that I discover. There seems to be a lot of things to explore and frustration by users in getting some of their previous videos from other devices into the camera roll to edit. Personally, I see the primary function of the iPad 2 video camera and iMovie app for editing an occasional movie that I might take on the iPad 2, but for any serious editing of longer movies that I might take with a video camera I would probably use iMovie on my Mac which has so many other features readily available. Not sure if Apple intends to add more features to the app, but I secretly hope so as well.
One of the other things that I learned in my exploration of iMovie today is that you should also have the location set to ON in your Settings on your iPad for iMovie to be able to access your camera roll.
In addition, I emailed a movie from Talking Tom app of the cute cat from my iPad 2 to myself. I then saved the movie to the camera roll from the email, but it did NOT show up in the list of videos that I could edit. It seems that the format that came directly from Talking Tom app was not set to the format needed by iMovie. So I dragged the video into iTunes and then using the Advanced>Create iPod or iPhone Version from the menubar in iTunes to convert it to a format that would work with iMovie app. I then dragged Talking Tom converted video to my desktop and then emailed it back to my iPad 2 and saved to camera roll. I was then able to edit the Talking Tom video, adding a music theme and title.
TEST: I recorded a brief video using my iPhone 3GS and emailed it from the iPhone 3GS to an account that I could access on my iPad 2. I then accessed the email on my iPad 2, allowing time for the video to load in, I then clicked Save Video (which went to my Camera Roll). I was able to load that video into the iMovie app on my iPad 2 and created a new project, adding theme music and title. While doing this edit, I discovered if you tap on one of the audio tracks in the movie timeline, you can adjust the volume of each one.
Once the videos were edited, I uploaded both of these last two videos to YouTube using iMovie share option on my iPad 2. The uploads seemed to work fine if I selected Public. I had problems uploading them as Unlisted. Tweet
Subscribe to:
Posts (Atom)