Using ColorSync Utility
There is a way to reduce the size of a pdf using an app on your Mac called ColorSync Utility
You can find this app by running Launchpad on the dock and then find the Utility Folder or by using the Finder search for ColorSync Utility app.


After running the app, you will need to duplicate the Reduce File Size Filter.
At the bottom of the opening window click on the Filter pull down menu. On my machine, I choose Live Update from Filter Inspector (I'm using Mountain Lion and I'm not sure what the option is for Lion System). This brings up the Filters Window as shown below.
Selecting Reduce File Size --- from the list on the left and moving over to the down arrow on the far right of this selection click on Duplicate Filter. This adds the new filter called Reduce Filter Size Copy to the list on the left hand side.

Now clicking on the arrow next to Reduce File Size Copy, you will see the following options: Image Sampling and Image Compression. You will need to change the settings in the Image Sampling (click on down arrow) to reveal the following:

Delete all the values in the boxes and change the Resolution to 100 and leave at High Quality.

Now Open a pdf file or a copy of your pdf to test.
Select from the Filter at the bottom of the screen on left: The newly created filter called Reduce File Size Copy.

Hit the Apply button and wait a few seconds or minutes (depending the size of the pdf that you are working with)
Now using Save As option - give it a new name and save to your Desktop. When comparing the size of the files, you should find a reduction in the pdf file size.
Moving the Custom Filter to Use with Preview
To add this same filter to Preview as an option, you will need to:
Just copy your filter from
to
/Library/PDF Services/
and the customized profile will be added to your Preview options.
To find this /Users/YourName/Library/Filters folder and your custom filter:
Bring up a Finder window, then hold down Cmd shift G and type in the path name above into the text box that appears on the screen with your username in place of YourName in the path.

Using the Cmd shift G again, type in /Library/PDF Services/ in the text box. Now drag the duplicate file that is on your desktop into that folder. You may be asked to Authenticate the move, and you will need to type in your Administrator's password.
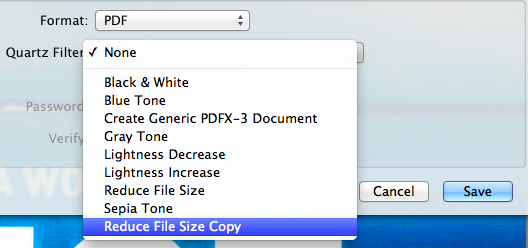
Now when you run Preview your custom option will be available for saving using the Quartz Filter - Reduce File Size Copy.
 Tweet
Tweet
16 comments:
Brilliant!!! thank you so much!
Thanks for the tip! Much appreciated.
Absolutely brilliant. Thank you so much!!!!!
Tx -- especially the latter part about making the new filter appear in Preview is much appreciated :)
However, there's a small glitch: while making the PDF smaller, the process also removes (or loses?) all hyperlinks that may have been there in the original (bigger) PDF. Any advice to work around this?
Whoops -- too quick to comment: pls disregard my question from above (about maintaining links). Looks like once the filter is embedded in Preview (using the approach described in this blog) and used from there, the resulting, smaller PDF also contains the links.
My initial comment was based on testing the same operation directly in ColorSync; in there, the links were left out from the resulting file.
Sorry for the confusion & thanks for the good tip :)
Thanks a lot!!!
Thank you!!!
HiTek Joan, you're a star: I found many many sites mentioning the same three filters from Jerome Colas, which is fine.
But doesn't help if they don't work - which in my case they don't because I have a complicated pre-compressed pdf thing I won't bore anyone with.
This: Short 'n sweet.
Yep, super awesome! I couldn't get the Preview one to show up in the quartz filter menu until I deleted the word "copy" after the qfilter extension: should be named "Reduce File Size Copy.qfilter" and NOT "Reduce File Size Copy.qfilter copy"
Thank you!
Thanks ALOT! Saved my day!
Hi, I am new to Macs and using this utility. Someone mentioned losing their hyperlinks when reducing the file. I am having the same problem even after using Preview to add the filter. Any thoughts? Thanks.
Hi I have done this step by step but the new PDF file created is always exactly the same size as the old one?
To make this a little easier to follow you can change the step:
Just copy your filter from
/Users/YourName/Library/Filters/"
to:
Just copy your filter from
~/Library/Filters/
~/ -> shortcut to your home folder
Brilliant. Just brilliant. thank you. my life is complete.
Thanks
It helps
excellent. much appreciated!! thank you.
Post a Comment